How do I set my Notification Preferences?
You can set notification preferences to receive updates about your courses. These steps apply for all users.
View Settings
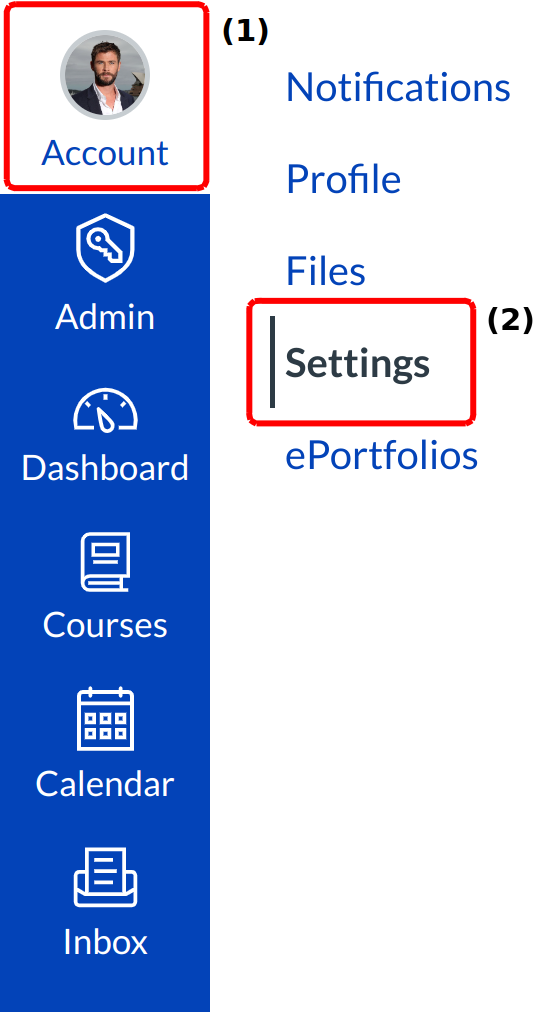
Click the Account link [1] and select the Settings link [2], within your personal settings, you can:
- Add ways for your fellow classmates to contact you
- Link to web services
- View and set notifications preferences
- View approved integrations
Add Ways to Contact
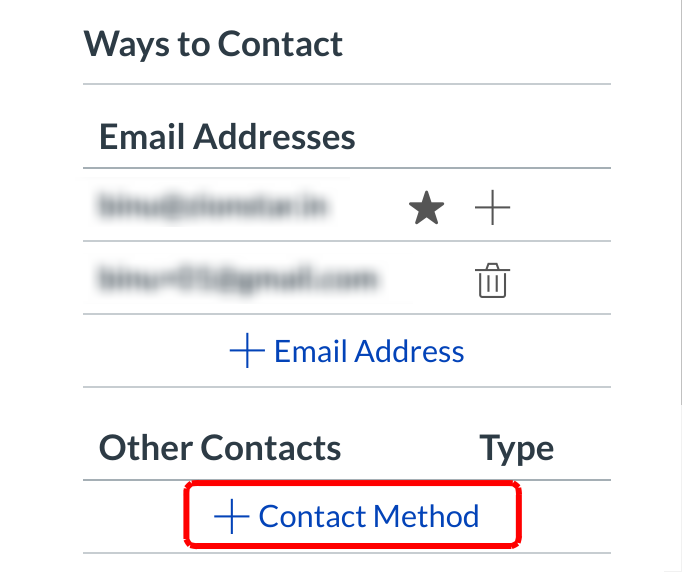
Before you can set your Notification Preferences, you will need to set the ways you want to be notified.
Your account will already display the email associated with your account. However, if you want to add an additional email address, and If you want to add any other type of contact method such as Twitter or text messages, click the Add Contact Method.
Edit Contact Methods
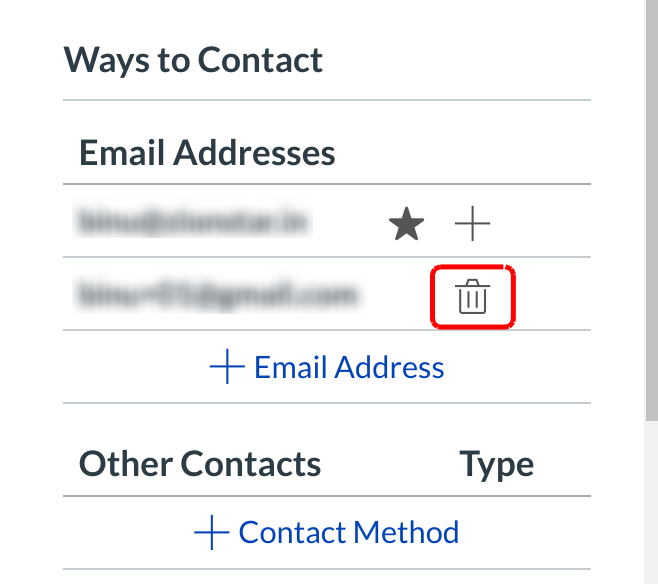
Once your additional contact methods have been verified, a checkmark will appear next to the method type . You can delete additional contact methods at any time by clicking the trash icon .
Link to Web Services
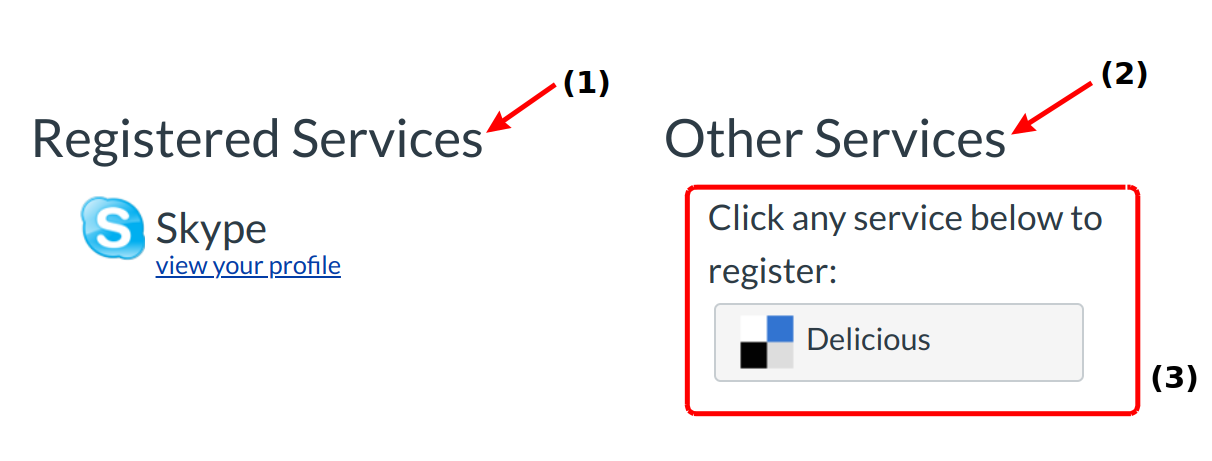
The Web Services portion on your settings page is divided into two columns. Services you have already registered, such as through the Ways to Contact section of your settings, or through course Collaborations and assignments, appear in the left column under the Registered Services heading [1].
Other services that are available for registration appear in the right column under the Other Services heading [2]. Register for any of these other services by clicking one of the [ServiceName] buttons [3]. Once you have registered for that service properly, the service name will move from the right column to the left column. Repeat this process to add additional services.
View Notification Preferences
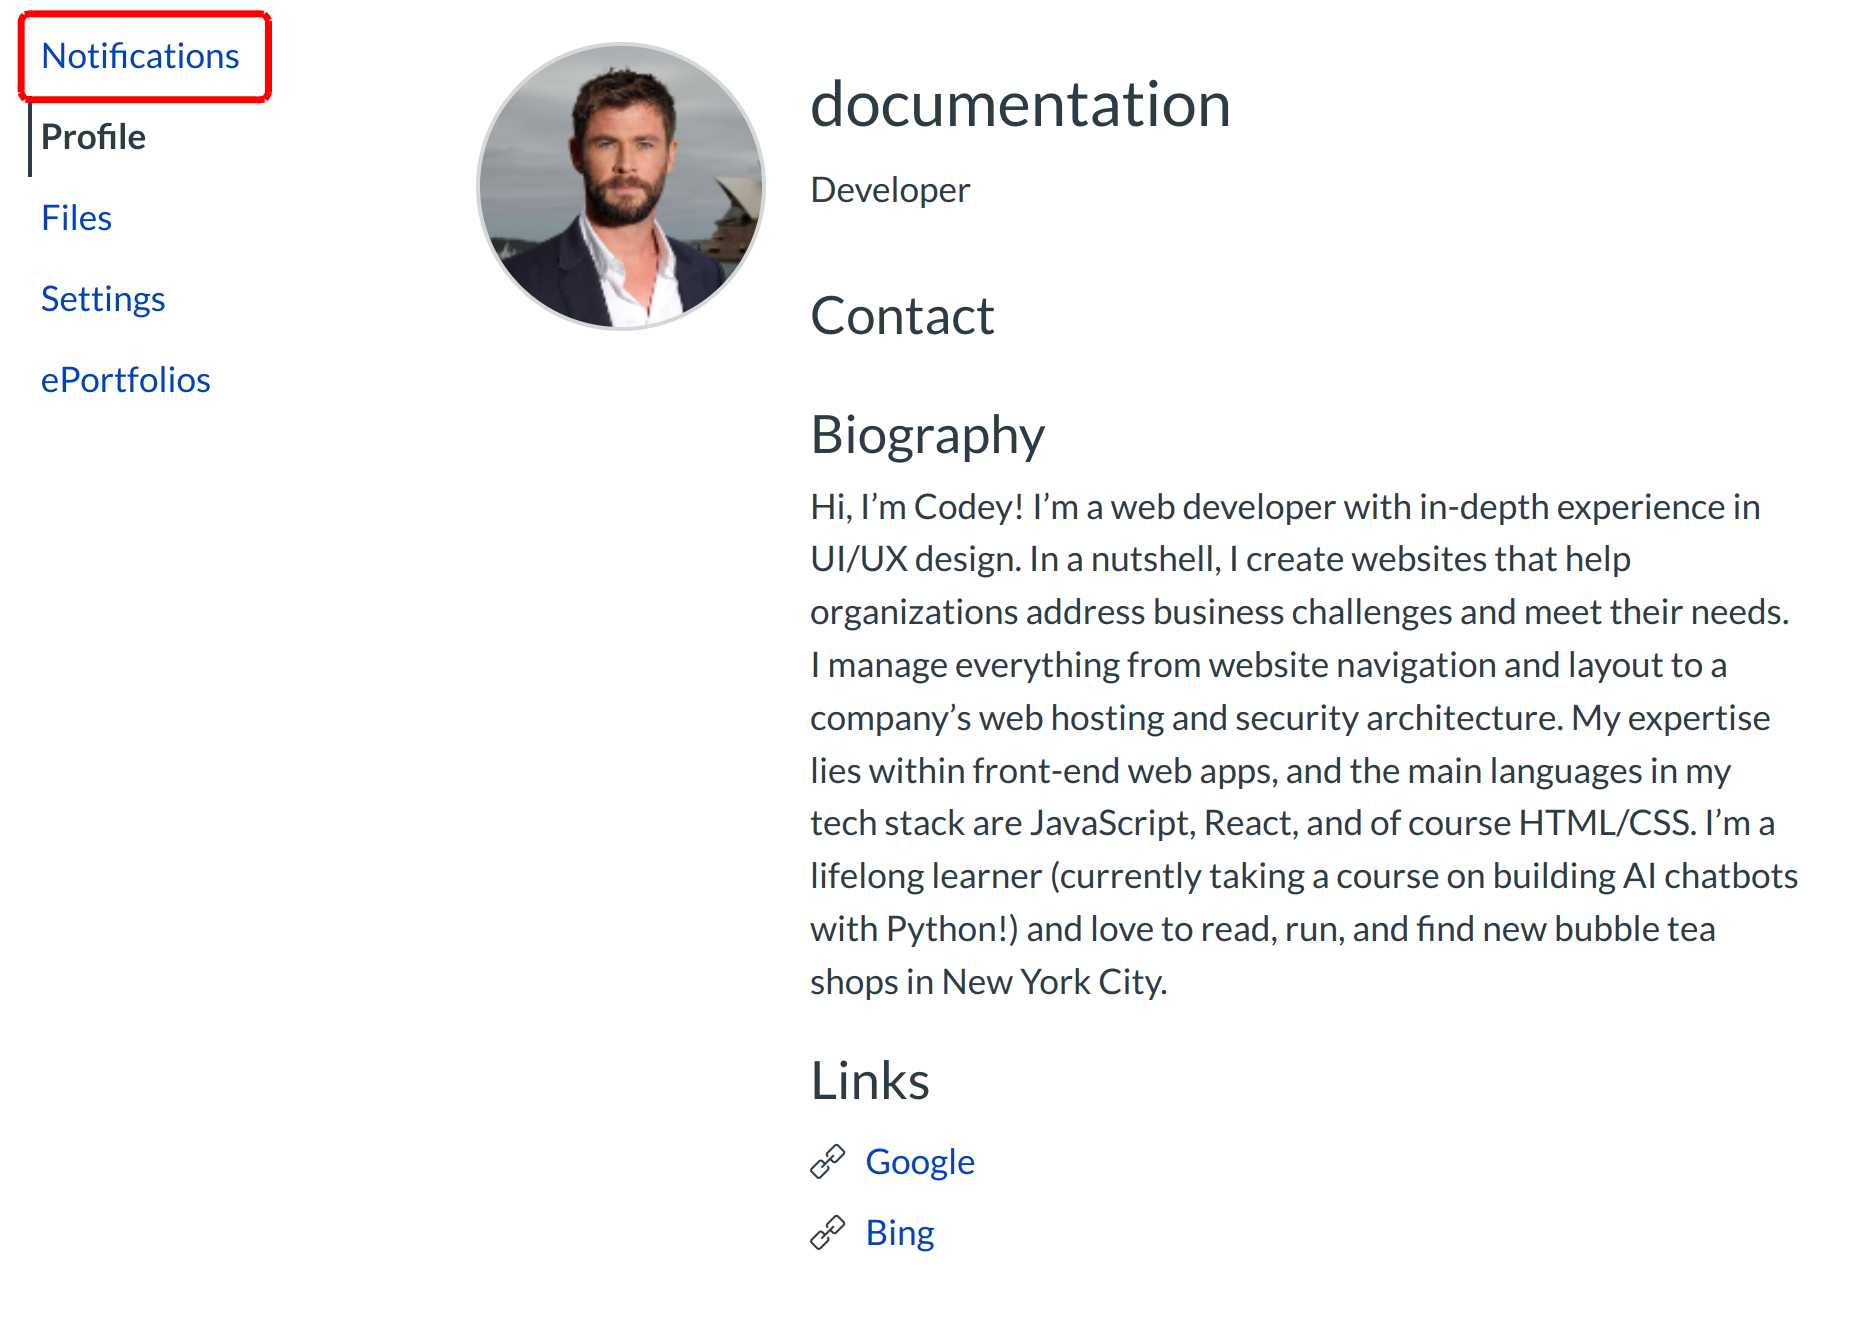
You can view and set notification preferences within your course. In the navigation menu, click the Notifications link.
View Notification Descriptions
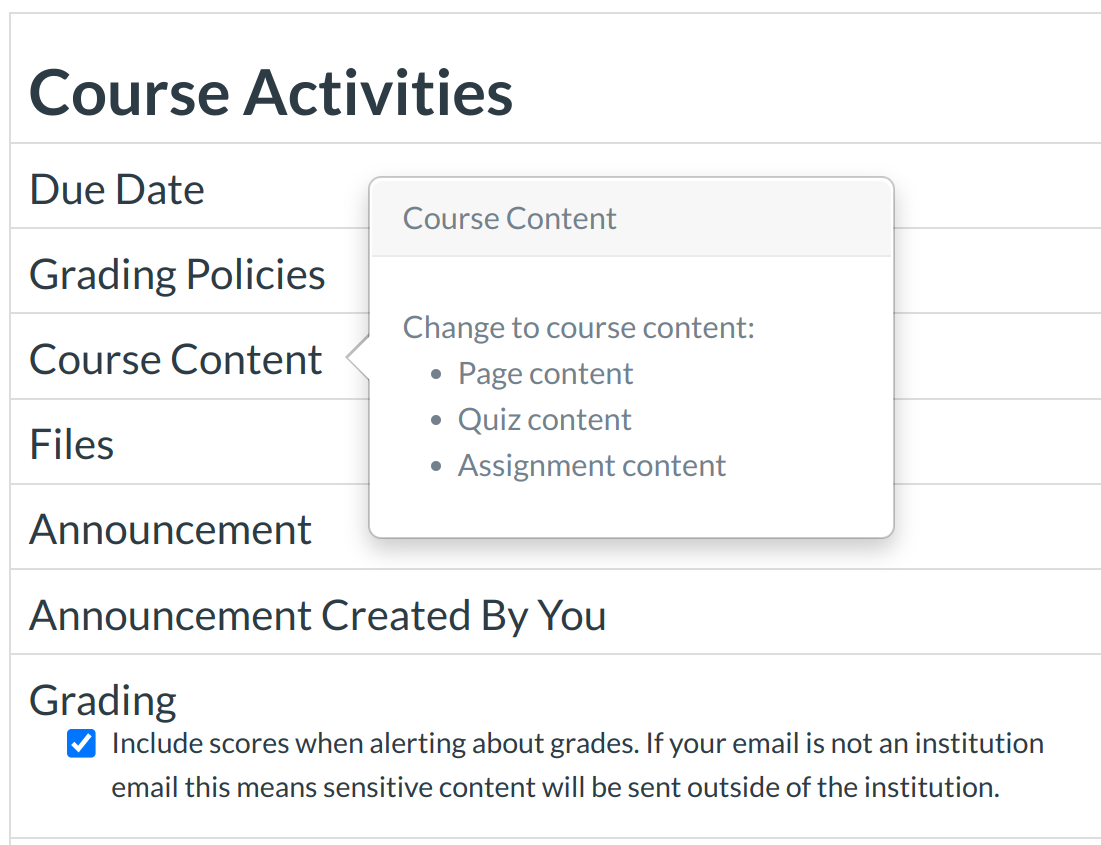
When you hover over the name of the notification, you can view the details of the notification and adjust your preferences.
Note: Some notifications are for instructors and admins only as noted in the hover descriptions:
View Notification Preferences
Your notifications preference page will display all of the contact methods you have created across the top of the page. You will need to specify how you want to be notified for each contact method.
The notifications are divided up into six categories:
- Course Activities
- Discussions
- Communications
- Scheduling
- Groups
- Alerts
Course Activities
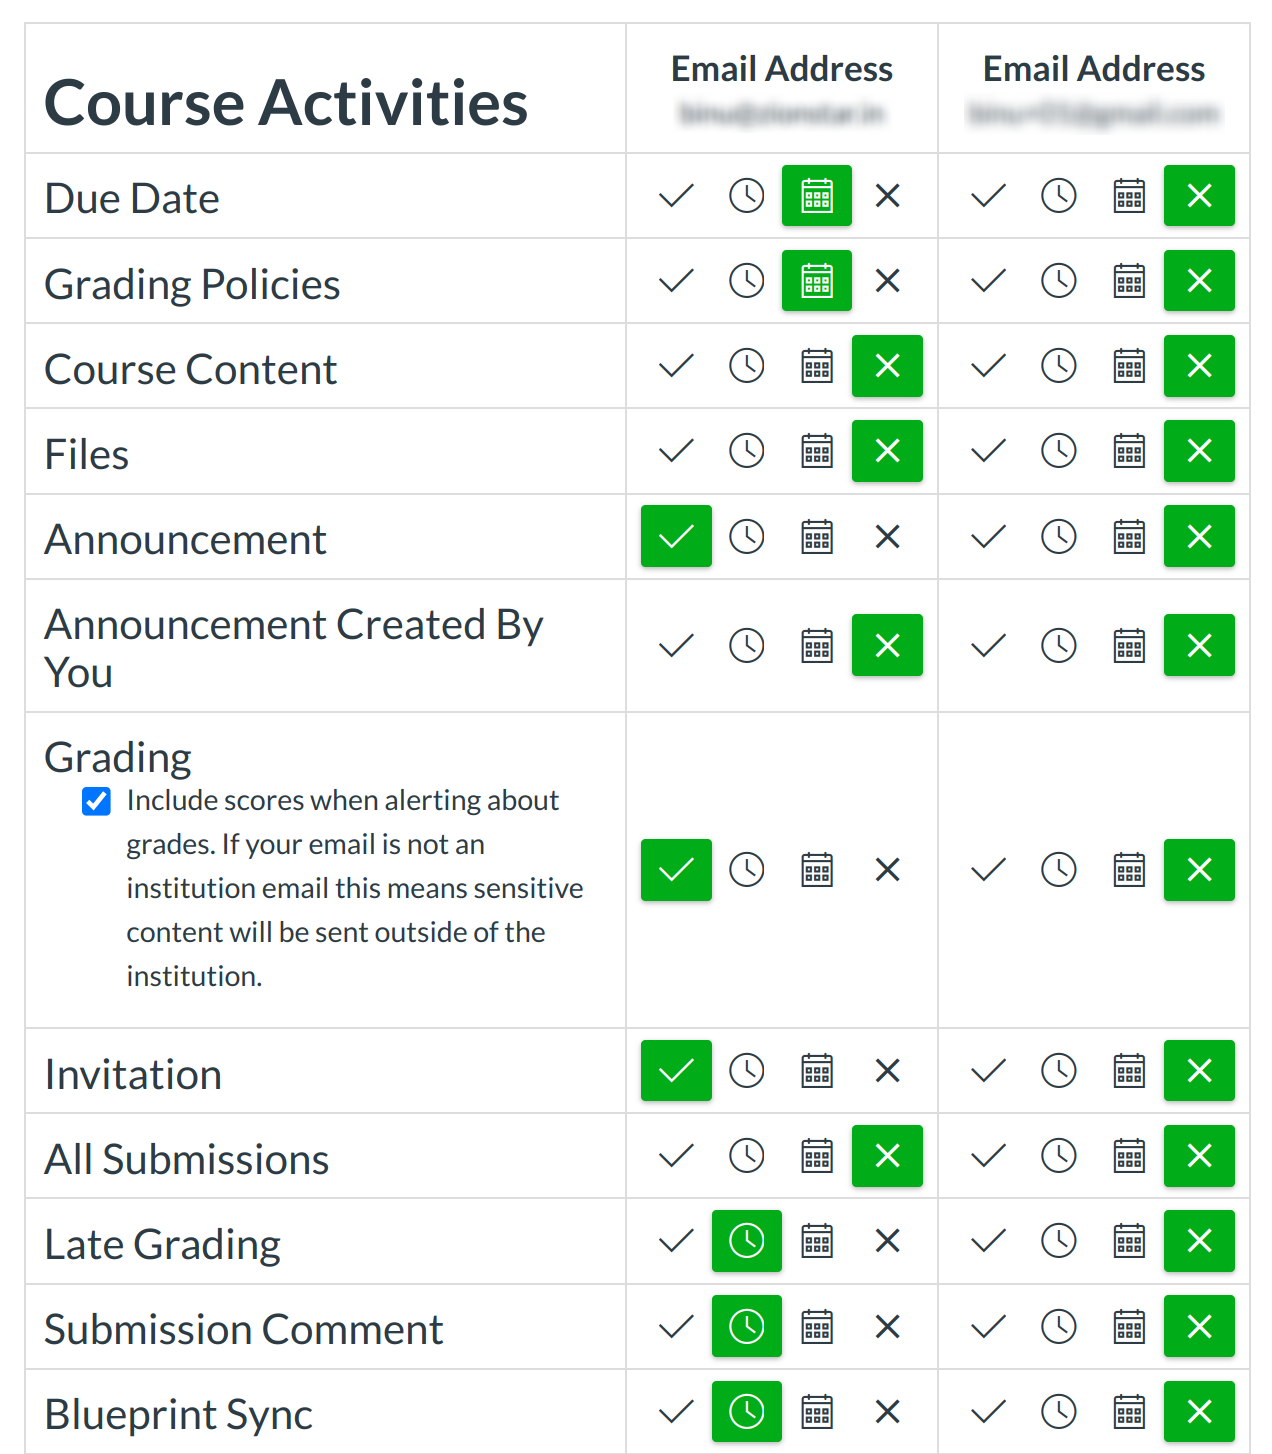
- Due Date: Assignment due date change
- Grading Policies: Course grading policy change
- Course Content: Change to course content including Assignment and Quiz content
- Files: New file added to your course. Sublime LMS ™ will only notify you of new files in a course once they have been updated.
- Announcement: New announcement in your course
- Grading: Includes assignments/submission grade entered/changed, unmuted assignment grade, grade weight changed. Check Include scores when alerting about grade changes check box if you want to see your grades in your notifications. If you aren't using your institutional email address, be aware that sensitive information will be sent outside the institution
- Invitation: Includes invitations to web conferences, collaborations, groups, course, peer review and peer review reminders
- All Submissions (Instructor & Admin only): Assignment submission/resubmission
- Late Grading (Instructor & Admin only): Late assignment submission
- Submission Comment: Assignment submission comment. Check the Mark new submission comments as read checkbox if you don't want submission comments to show up as a new message in your Sublime LMS ™ Inbox.
- Blueprint Sync: The content and settings in the blueprint course can then be pushed out to courses that are associated with the blueprint.
Discussions

- Discussion: New discussion topic in your course
- Discussion Post: New discussion post in a topic you're subscribed to
Conversations
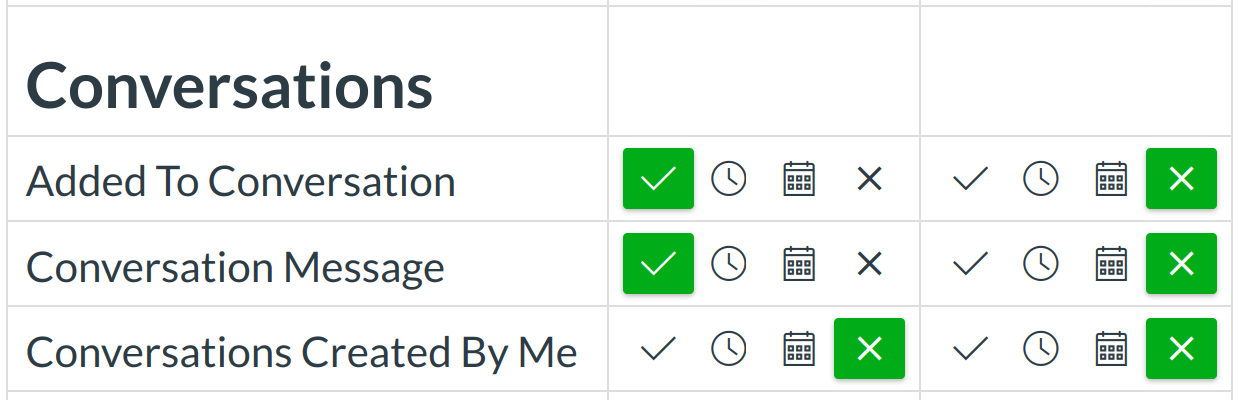
- Added to Conversation: You are added to a conversation
- Conversation Message: New Inbox message
- Conversation Created By Me: Newly created conversations are available here
Scheduling
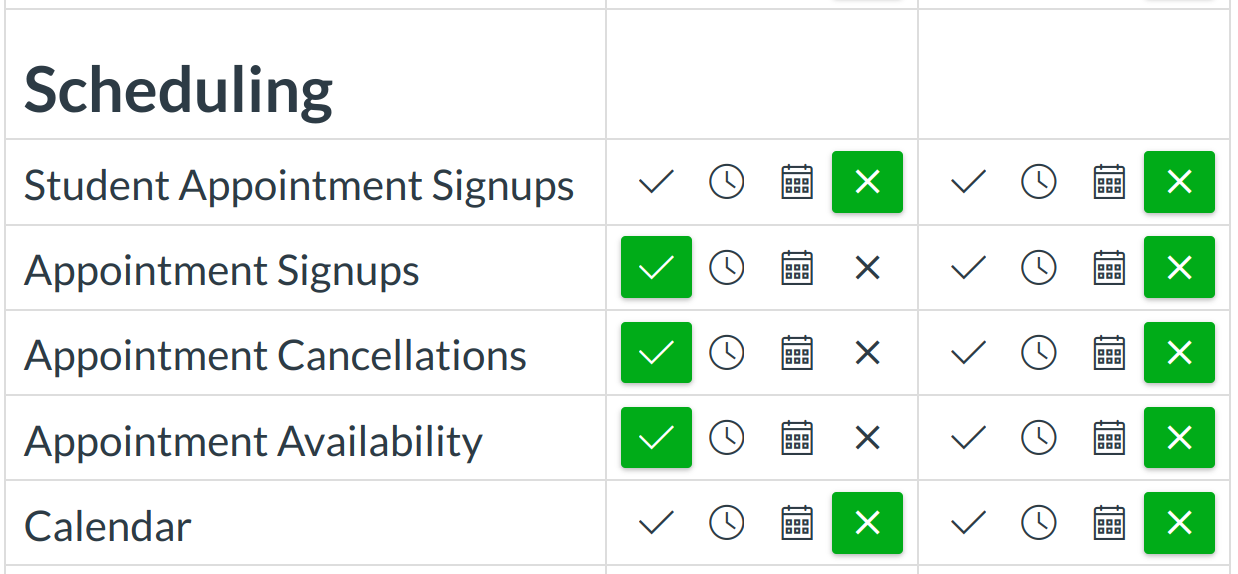
- Student Appointment Sign ups (Instructor & Admin only): Student appointment sign up using Scheduler
- Appointment Sign ups: New appointment on your calendar
- Student Appointment Cancellations: Appointment cancellation
- Appointment Availability (Instructor & Admin only): Change to appointment time slots
- Calendar: New and changed items on your course calendar
Groups

Group Membership Updates: Group enrollment, accepted/rejected membership; (Admin only) pending enrollment activated
Alerts
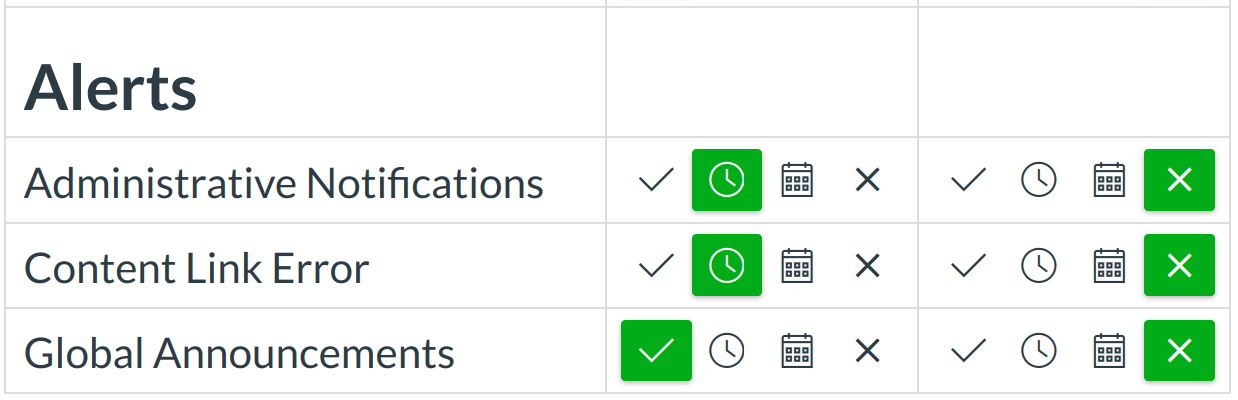
- Administrative Notifications (Instructor & Admin only): includes course enrollment, report generated, context export, migration export, new account user, new teacher registration, new student group
- Content Link Error: This setting alerts you when a student clicks a link to unpublished content, content with permission errors, or a broken link
- Global Announcements: Global Announcements are intended to provide students, faculty, and staff with information related to classroom technology and critical academic matters.
View Weekly Notification Time

The date and time will vary between users.
Edit Notification Preferences
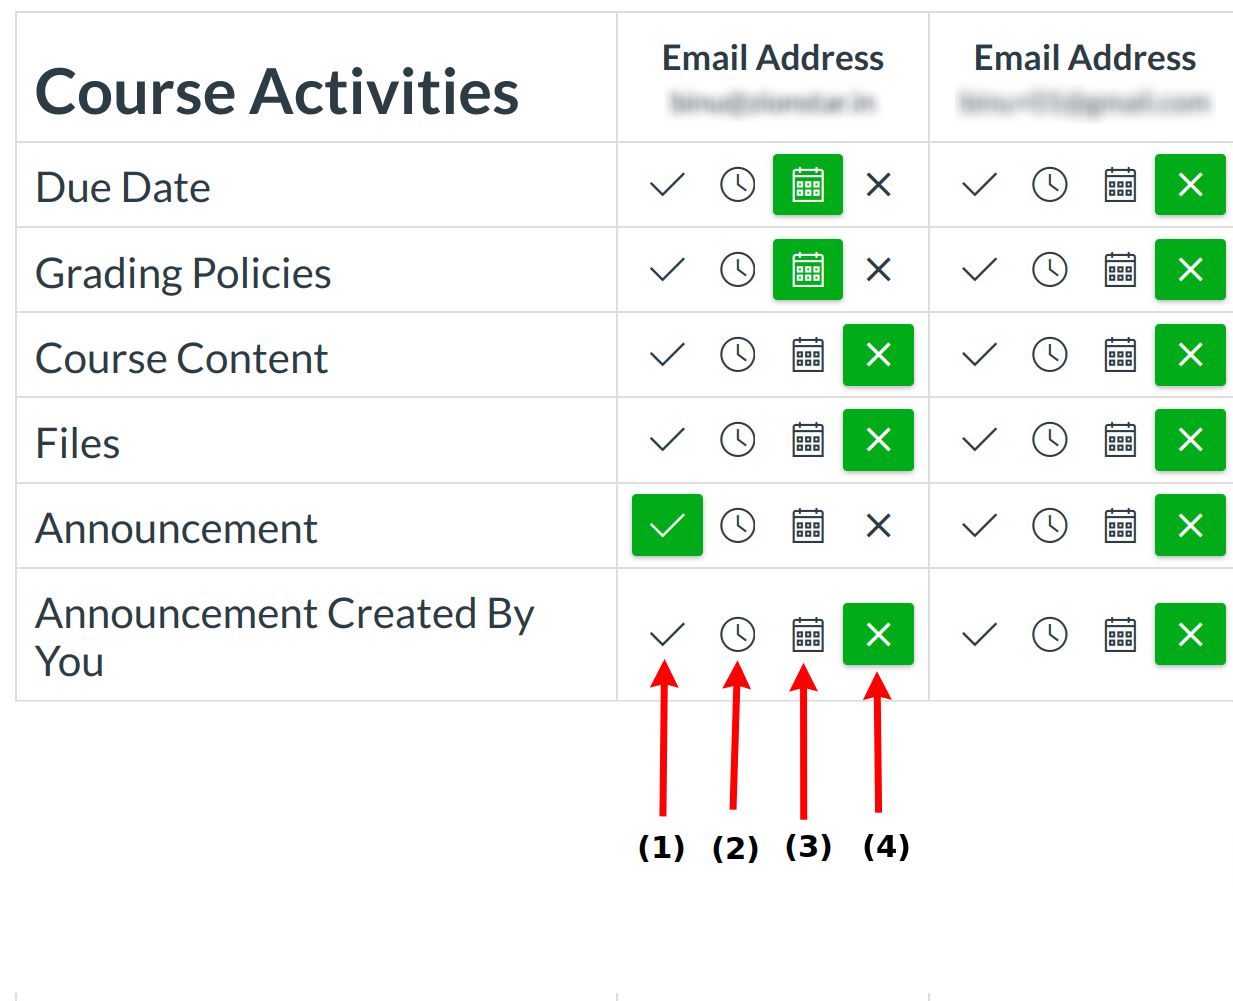
To change a notification for a contact method, hover over the notification type you want to change. Select one of four options.
- Select the Checkmark icon to be notified immediately of any change for the activity.
- Select the Clock icon to be notified daily of any change for the activity.
- Select the Calendar icon to be notified weekly of any change for the activity.
- Select the X icon to remove the notification preference so you won't be notified of any change for the activity.
View Approved Integrations
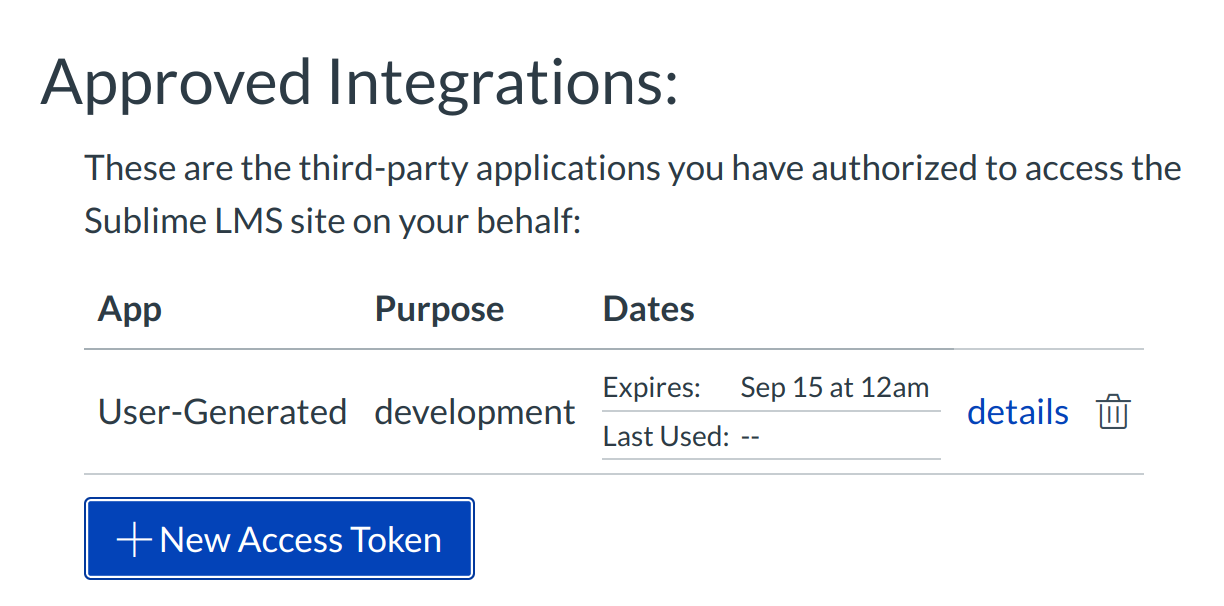
When you allow third-party integrations to access your account, they will appear in the Approved Integrations section. Each integration will show you the name of the application, the purpose (if one is noted), the date the application was last used, the date the application expires, and a link to view further details.